Melbourne Stars beat Sydney Sixers by seven wickets in this Big Bash League 2025-26 clash at the Sydney Cricket Ground on December 26, 2025. Anyone pulling up the Sydney Sixers vs Melbourne Stars match scorecard for Match 11 wants one thing immediately: Sydney Sixers were dismissed for 144, and Sam Harper’s unbeaten 110 off 60 balls carried Melbourne Stars to 145/3 in 17.3 overs, sealing a comfortable Boxing Day win with 15 balls to spare.
This wasn’t a tight finish decided in the final over. It was one innings, from one batter, that turned a competitive T20 run chase into a formality almost as soon as it started. Below is the complete Sydney Sixers vs Melbourne Stars match scorecard, including both batting cards, full bowling figures, fall of wickets, Playing XIs, match officials, key partnerships, boundary breakdowns, and the specific turning point that decided the contest.
Quick Result
Melbourne Stars won by seven wickets, chasing Sydney Sixers’ 144 in 17.3 overs at the SCG. Daniel Hughes was Sydney’s top scorer with 60 off 42 balls, but Sam Harper’s maiden century in domestic T20 cricket made the target look 30 to 40 runs short of what it actually needed to be on a pitch offering extra bounce.
The result was rarely in doubt once Harper found his rhythm in the eighth over of the chase. He batted through the entire innings, finished not out, and posted a strike rate of 183.33-meaning Melbourne Stars never had to rely on any partner doing more than rotating the strike and absorbing the occasional dot ball at the other end. By the time the required run rate dipped below six an over, the match had effectively already been decided.
Match at a Glance
| Detail | Information |
| Match | Big Bash League 2025-26, Match 11 |
| Date | December 26, 2025 (night match) |
| Venue | Sydney Cricket Ground, Sydney |
| Toss | Melbourne Stars won, elected to bowl |
| Result | Melbourne Stars won by 7 wickets (15 balls remaining) |
| Player of the Match | Sam Harper (110* off 60) |
| Score | Sydney Sixers 144 (20 ov), Melbourne Stars 145/3 (17.3 ov) |
| Winning margin | 7 wickets, 15 balls to spare |
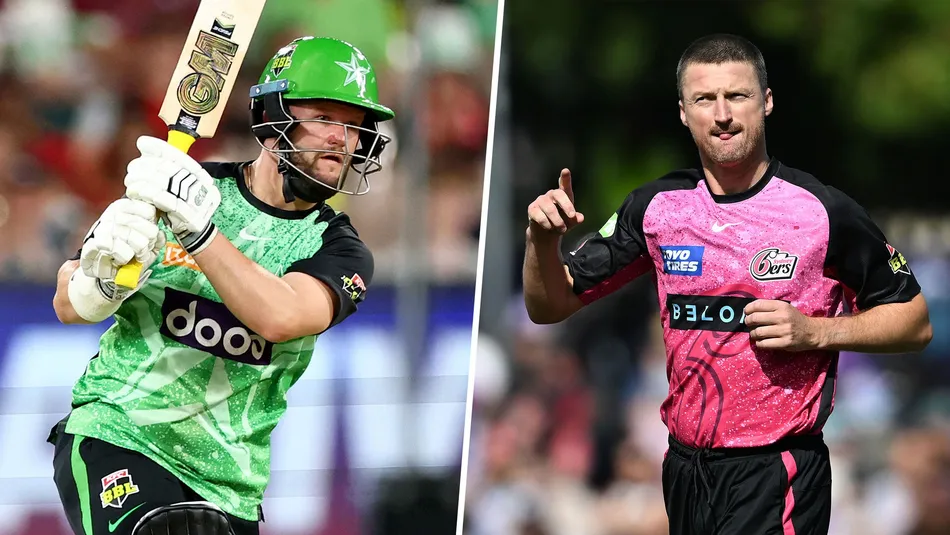
Melbourne Stars won the toss and chose to bowl first, a decision built around the SCG’s tendency to offer more for pacers under lights early in a T20 innings. The surface carried extra bounce and rewarded well-directed short-pitched bowling, which is exactly why Peter Siddle and Tom Curran troubled Sydney’s top order inside the first ten overs. Harper himself later described the pitch as “not an easy pitch” to bat on-a comment that makes his own innings look even more exceptional in hindsight, given he scored at nearly double the rate of every other batter on either side.
Match Officials
| Role | Official |
| Umpire | Gerard Abood |
| Umpire | Troy Penman |
| TV Umpire | Ben Treloar |
Both on-field umpires were experienced Australian officials familiar with SCG conditions, and neither side lodged a review that overturned an on-field decision during the match.
Playing XIs
Both franchises brought settled, experienced BBL lineups into this Sydney Sixers vs Melbourne Stars match scorecard, with each side built around a top-order anchor and a pace-heavy bowling attack.
Read More: MI Emirates vs Gulf Giants Match Scorecard
Sydney Sixers Playing XI
Moises Henriques (captain), Babar Azam, Josh Philippe (wicketkeeper), Daniel Hughes, Jordan Silk, Jack Edwards, Ben Dwarshuis, Joel Davies, Ben Manenti, Sean Abbott, Kane Richardson.
Sydney’s XI leaned heavily on all-round depth, with Edwards, Dwarshuis, Davies, Manenti, and Abbott all capable of both bowling a full quota of overs and contributing lower-order runs. That depth didn’t translate into a big total on this occasion, but it explains why Sydney’s tail-Davies, Manenti, and Richardson in particular-managed some brisk, if brief, cameos near the end of the innings.
Melbourne Stars Playing XI
Marcus Stoinis (captain), Joe Clarke, Sam Harper (wicketkeeper), Campbell Kellaway, Glenn Maxwell, Hilton Cartwright, Tom Curran, Jonathan Merlo, Mitchell Swepson, Haris Rauf, Peter Siddle.
Melbourne’s XI is notable for how little of it was needed in the chase. Six of the eleven players named-Stoinis, Maxwell, Cartwright, Swepson, Rauf, and Siddle-did not bat at all, since Harper, Clarke, Kellaway, Merlo, and Curran got the job done between them. That’s an unusually top-heavy contribution pattern for a T20 chase and underlines just how dominant Harper’s innings was.
Key Match Timeline
Sydney Sixers lost their first wicket inside two overs and never fully recovered, while Melbourne Stars needed just two partnerships to finish the job in under 18 overs. The timeline below captures every decisive moment from both innings.
First Innings Timeline (Sydney Sixers)
- 1.5 overs: Babar Azam dismissed by Tom Curran-Sixers 5/1
- 7.6 overs: Josh Philippe dismissed-Sixers 54/2
- 12.2 overs: Daniel Hughes dismissed by Tom Curran for 60-Sixers 90/3
- 15.1–15.6 overs: Two wickets fall in quick succession (Henriques, Silk)-Sixers slip to 112/5
- 17.4–19.6 overs: Sixers lose their last five wickets for just 14 runs
- 19.6 overs: Sixers all out for 144 in the final over
Second Innings Timeline (Melbourne Stars)
- 0.2 overs: Joe Clarke dismissed by Sean Abbott-Stars 1/1
- 6.2 overs: Campbell Kellaway dismissed by Joel Davies-Stars 55/2, Harper on 37
- 16.1 overs: Jonathan Merlo dismissed-Stars 139/3, six runs needed
- 17.3 overs: Sam Harper hits the winning runs, finishing 110*-Stars 145/3
Sydney Sixers Innings-144 All Out (20 Overs)
Sydney Sixers’ batting card tells a story of one substantial partnership surrounded by regular wickets. Daniel Hughes’ 60 off 42 balls was the only score of real note, and once he fell in the 13th over, the lower order never found the boundaries needed to push the total past 150.
Batting Scorecard
| Batter | Dismissal | R | B | 4s | 6s | SR |
| Babar Azam | c Maxwell b Curran | 2 | 7 | 0 | 0 | 28.57 |
| Daniel Hughes | c Kellaway b Curran | 60 | 42 | 8 | 1 | 142.86 |
| Josh Philippe | c Maxwell b Stoinis | 10 | 12 | 1 | 0 | 83.33 |
| Moises Henriques | c Swepson b Siddle | 18 | 19 | 1 | 0 | 94.74 |
| Jordan Silk | c Curran b Siddle | 12 | 13 | 2 | 0 | 92.31 |
| Jack Edwards | c Siddle b Curran | 11 | 6 | 2 | 0 | 183.33 |
| Ben Dwarshuis | c Stoinis b Rauf | 5 | 3 | 1 | 0 | 166.67 |
| Joel Davies | c Maxwell b Siddle | 8 | 6 | 0 | 1 | 133.33 |
| Ben Manenti | run out (Stoinis/Harper) | 4 | 5 | 0 | 0 | 80.00 |
| Sean Abbott | c Harper b Stoinis | 3 | 4 | 0 | 0 | 75.00 |
| Kane Richardson | not out | 5 | 3 | 1 | 0 | 166.67 |
| Extras | (b 1, lb 1, w 4) | 6 | ||||
| Total | 144 all out (20 overs, RR: 7.20) |
Fall of wickets: 1-5 (Azam, 1.5), 2-54 (Philippe, 7.6), 3-90 (Hughes, 12.2), 4-103 (Henriques, 15.1), 5-112 (Silk, 15.6), 6-118 (Edwards, 16.3), 7-130 (Dwarshuis, 17.4), 8-132 (Davies, 18.1), 9-137 (Abbott, 19.1), 10-144 (Manenti, 19.6)
Melbourne Stars Bowling Figures
| Bowler | O | M | R | W | Econ |
| Glenn Maxwell | 2 | 0 | 18 | 0 | 9.00 |
| Tom Curran | 4 | 1 | 26 | 3 | 6.50 |
| Peter Siddle | 4 | 0 | 23 | 3 | 5.75 |
| Haris Rauf | 4 | 0 | 37 | 1 | 9.25 |
| Marcus Stoinis | 4 | 0 | 25 | 2 | 6.25 |
| Mitchell Swepson | 2 | 0 | 13 | 0 | 6.50 |
Tom Curran and Peter Siddle took three wickets apiece, sharing new-ball and death-over responsibilities to dismiss Sydney Sixers for 144 in 20 overs. Their combined six wickets for 49 runs meant Melbourne Stars’ bowling attack did the harder half of the job well before Harper’s bat took over-Curran in particular bookended the innings, removing Babar Azam in the second over and Jack Edwards in the death overs.
Melbourne Stars Innings-145/3 (17.3 Overs)
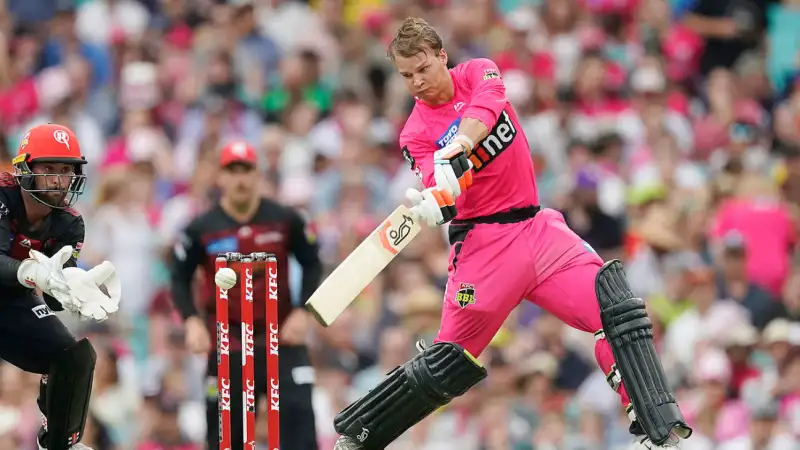
If Sydney’s innings was defined by one substantial score, Melbourne Stars’ reply was defined by a single overwhelming one. Sam Harper batted from the second over to the winning run, finishing unbeaten and accounting for more than three-quarters of his team’s total.
Batting Scorecard
| Batter | Dismissal | R | B | 4s | 6s | SR |
| Joe Clarke | b Abbott | 0 | 2 | 0 | 0 | 0.00 |
| Sam Harper | not out | 110 | 60 | 12 | 6 | 183.33 |
| Campbell Kellaway | c Azam b Davies | 14 | 19 | 2 | 0 | 73.68 |
| Jonathan Merlo | c Abbott b Davies | 14 | 21 | 0 | 0 | 66.67 |
| Tom Curran | not out | 2 | 3 | 0 | 0 | 66.67 |
| Extras | (w 4, lb 1) | 5 | ||||
| Total | 145/3 (17.3 overs, RR: 8.29) |
Fall of wickets: 1-1 (Clarke, 0.2), 2-55 (Kellaway, 6.2), 3-139 (Merlo, 16.1)
Also Read: Ireland Cricket Team vs Oman National Cricket Team Match Scorecard
Sydney Sixers Bowling Figures
| Bowler | O | M | R | W | Econ |
| Sean Abbott | 3.3 | 0 | 30 | 1 | 8.57 |
| Jack Edwards | 4 | 0 | 33 | 0 | 8.25 |
| Kane Richardson | 2 | 0 | 41 | 0 | 20.50 |
| Ben Dwarshuis | 3 | 0 | 18 | 0 | 6.00 |
| Joel Davies | 4 | 0 | 16 | 2 | 4.00 |
| Ben Manenti | 1 | 0 | 6 | 0 | 6.00 |
Joel Davies was Sydney’s clear bowling standout despite finishing on the losing side, conceding just 16 runs from four overs and taking two of the three wickets to fall. No other Sydney bowler could contain Harper for a sustained spell, and Kane Richardson’s two overs alone cost more than a quarter of the entire target-an economy rate of 20.50 that stands out even by modern T20 death-bowling standards.
Boundary Analysis: Where the Runs Actually Came From
Aggregating the boundary counts from both batting cards shows exactly how differently the two innings were built.
| Innings | Total Fours | Total Sixes | Runs from Boundaries | % of Total Score |
| Sydney Sixers (144) | 16 | 2 | 76 | 52.8% |
| Melbourne Stars (145/3) | 14 | 6 | 92 | 63.4% |
Sydney Sixers spread their 16 fours across nine different batters, a sign of a chase-and-nudge innings without one dominant scorer. Melbourne Stars, by contrast, hit fewer fours but three times as many sixes-and every one of those six sixes came off Sam Harper’s bat. That single fact captures the entire match: Sydney scored steadily and collectively, Melbourne Stars scored explosively and individually.
Sam Harper’s Match-Winning 110*
This is the single most important entity in this Sydney Sixers vs Melbourne Stars match scorecard, and it deserves its own detailed breakdown.
| Metric | Figure |
| Runs | 110* |
| Balls | 60 |
| Fours | 12 |
| Sixes | 6 |
| Runs from boundaries | 84 (76.4% of his own score) |
| Strike rate | 183.33 |
| Share of Stars’ total | 75.9% (110 of 145) |
| Milestone | Maiden century in domestic T20 cricket |
| Result | Stars won with 15 balls remaining |
Harper reached his fifty in 28 balls, according to live commentary from the match, and his century off 50-meaning the second half of his innings was scored even faster than the first. Twelve fours and six sixes at a strike rate above 183 turned what should have been a tense, tight run chase into a one-sided contest. This kind of individual dominance-where one batter contributes nearly 76% of a winning total, and 76% of his own runs came from boundaries-is rare even by Big Bash League standards, and it’s the primary reason this particular scorecard is worth searching for beyond the bare result.
What makes the innings more remarkable is the context: Harper walked in during the very first over after Joe Clarke fell for a duck, meaning he had to rebuild an innings from 1/1 rather than simply capitalize on a flying start set by someone else. Everything Melbourne Stars scored after over one effectively ran through him.
Key Partnerships
Harper needed support only twice, and both partnerships were built around the same pattern: Harper accelerating while his partner rotated the strike and absorbed dot balls.
| Wicket | Batters | Runs | Overs Span |
| 2nd | Harper & Kellaway | 54 | 0.2 to 6.2 |
| 3rd | Harper & Merlo | 84 | 6.2 to 16.1 |
Second-Wicket Stand: Harper & Kellaway (54 runs)
After Joe Clarke fell in the second over, Harper and Campbell Kellaway rebuilt with a 54-run second-wicket partnership, taking the score from 1/1 to 55/2. Kellaway’s 14 off 19 balls wasn’t quick by modern T20 standards, but it kept Harper on strike often enough for him to keep the scoreboard ticking over without added risk.
Third-Wicket Stand: Harper & Merlo (84 runs)
Once Kellaway departed, Harper and Jonathan Merlo added 84 more for the third wicket, the innings’ defining stand. Merlo’s 14 off 21 balls mirrored Kellaway’s approach almost exactly-steady, unhurried, and content to let Harper do the scoring. By the time Merlo fell at 139/3, only six runs were needed, and Harper finished the job himself two balls later in the 17.3rd over.
Turning Point: Harper Demolishes Kane Richardson
Every T20 run chase has a moment where the game visibly tips. Here, it was Kane Richardson’s two overs.
Sydney’s premier quick, Kane Richardson, endured the most expensive spell of the chase, conceding 41 runs from two overs without taking a wicket. Harper targeted him specifically, twice pulling Richardson into the Bill O’Reilly Stand for six. Peter Siddle and Tom Curran had restricted Sydney Sixers to 144 with disciplined three-wicket spells earlier in the day, but Richardson’s two overs in the chase undid a large part of that containment almost single-handedly. It’s a clean illustration of how one mismatched bowling matchup can swing an entire T20 match, regardless of how well the rest of the attack performs-and it’s exactly the kind of tactical detail a bare scorecard alone won’t show you.
Player of the Match: Sam Harper
Sam Harper was named Player of the Match for his unbeaten 110 off 60 balls, including 12 fours and six sixes at a strike rate of 183.33. He reached his fifty in 28 balls and his century off 50, then finished the chase himself to seal Melbourne Stars’ third win in three matches to open BBL 2025-26. For a wicketkeeper-batter who had, in his own words, previously shown only “flashes of brilliance” in earlier BBL seasons, this innings marked a clear step into consistent, match-winning form-the kind selectors and fantasy-league followers alike take note of.
Season Context
This result extended Melbourne Stars’ unbeaten start to BBL 2025-26 to three wins from three matches-arguably their best start to a season in over a decade. For Sydney Sixers, it was a third defeat in four games, and it exposed real gaps in both their middle-order batting depth and their short-ball bowling plans against an in-form top-order batter.
Head-to-Head Series Context
The two sides met again on January 8, 2026 at the MCG, where Sydney Sixers won by six wickets to level the season series 1-1, with Ben Dwarshuis taking 4/13 to dismantle the Stars’ middle order in that rematch. Together, the two meetings form one of the more lopsided-yet-balanced head-to-head storylines of BBL 2025-26-one match won by an individual batting masterclass, the other won by a disciplined bowling collapse in reverse.
Why This Scorecard Still Matters
Beyond the bare numbers, Match 11 became a reference point for two separate storylines that carried through the rest of BBL 2025-26. For Melbourne Stars, it was the moment Sam Harper shifted from a promising wicketkeeper-batter into a genuine match-winner at the top of the order-a role he continued to occupy through the rest of the season. For Sydney Sixers, the defeat highlighted a recurring vulnerability: an attack capable of taking early wickets but short on death-overs control once a set batter got going. Both threads are worth tracking if you’re following either franchise’s form heading into the back half of the tournament.
Frequently Asked Questions:
Who won the Sydney Sixers vs Melbourne Stars match in Match 11?
Melbourne Stars won by 7 wickets, chasing 145 in 17.3 overs at the Sydney Cricket Ground on December 26, 2025.
Who was Player of the Match in Sydney Sixers vs Melbourne Stars Match 11?
Sam Harper, for his unbeaten 110 off 60 balls in the successful run chase.
What was the highest individual score in this Sydney Sixers vs Melbourne Stars match scorecard?
Sam Harper’s 110* was the highest score, followed by Daniel Hughes’ 60 for Sydney Sixers.
Where was the Sydney Sixers vs Melbourne Stars Match 11 played?
The Sydney Cricket Ground (SCG) in Sydney, on Boxing Day, December 26, 2025.
What was the toss result in this match?
Melbourne Stars won the toss and chose to bowl first.
How many sixes did Sam Harper hit in his 110*?
Sam Harper hit six sixes and 12 fours in his unbeaten 110 off 60 balls.
Who took the most wickets for Sydney Sixers in this scorecard?
Joel Davies was Sydney’s best bowler, taking 2/16 from four overs, despite finishing on the losing side.
Was Sam Harper’s century his first in T20 cricket?
Yes, this was Sam Harper’s maiden century in domestic T20 cricket.
How did Melbourne Stars complete the chase so quickly?
Sam Harper batted through the entire innings, supported by two calm partnerships with Campbell Kellaway (54 runs) and Jonathan Merlo (84 runs), allowing Melbourne Stars to reach 145/3 in 17.3 overs.
Did Sydney Sixers get revenge for this loss later in the season?
Yes. When the sides met again on January 8, 2026, Sydney Sixers won by 6 wickets, leveling their two BBL 2025-26 meetings with Melbourne Stars at one win apiece.